Sort of a tutorial. There are others out there -- I linked to at least one when I did Crafty Fun Fridays (old blog) -- but I've been in a picture-taking mood, so you get my version as well. I've been meaning to make some ever since I first posted, and have been stashing small items with the project in mind, but never got around to it. A few weeks ago, I went to a baby shower where one of the games was a bottle like these (except it was a giant baby bottle and filled with baby-themed items). Long after the time was up, the guests were turning the bottles back & forth, trying to check everything off the list.
For Christmas, I wanted to give these to my niece and nephew, hoping that I hadn't waited too long and that K, my 10-year-old niece, wouldn't think them too childish. They actually enjoyed them, and I have a few lessons learned to share along with the photos I took during the making. Gather Materials
Clear plastic bottle with wide mouth. (I used a large Aquafina bottle.) Drink the water, remove the label, rinse and make sure it's dry as a bone -- bottle and lid.
Cheap/stale rice. No sense using the good stuff; it's not going to be eaten later! (I got 3-lb. bags for $2 ea. at Big Lots.) This size bottle took about 2 lbs. each.
Small toys (more on that later).
Glue (I used Gorilla Glue, because it's what we had.) You don't want the kids opening the bottles and spilling rice everywhere! (Plus, many of the toys are choking hazards.)
Tools: scissors & funnel
Optional: Permanent markers to color-code bottles, if desired; cards to list items; rubber bands; hole punch (for cards)
 About the toys
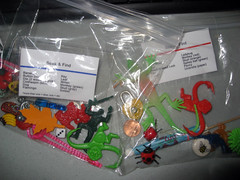
Gather a bunch of smallish non-perishable items (Close-up). Some regular household items will also work.
Lessons learned: the tiny diary-size key was too small and couldn't be found in either bottle, by children or adults. The bee bead turned out to be the exact color of the rice and was also not found by children or adults. Truly white items (like the dice) worked out okay. Too long items (like the huge paper umbrella) aren't a great idea (but the flamingo was fine). I don't recommend foam items (like the leaf).
If you're going to make a list, make sure all the items fit through the bottle opening first. The monkeys had to be forced in (because I'd already made the lists and laminated them!). Keep toys away from tiny tots until they're safely sealed inside the bottles!
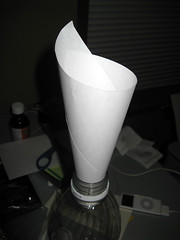 Snip a corner off the rice bag, and using a funnel (plastic or an improvised paper one), pour a few inches of rice into the bottle.
 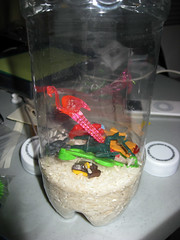 This picture shows another lesson learned: rather than stopping at one point and shoving all of the toys into the bottle like I did, add one or two every inch or so. You'll have less work trying to get things redistributed.
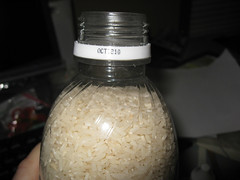 The amount of rice in the bottle dictates the difficulty level. I wouldn't go higher than this point, but if you wanted to make it easier, you could stop about an inch earlier.
 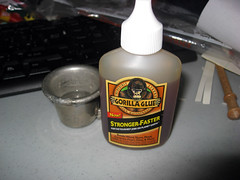 Glue the cap onto the bottle. As mentioned previously, I used Gorilla Glue. To do so, I moistened the outside of the bottle, where the lid would screw on, with just a bit of water on my fingertip, and applied 3 tiny drops of glue on the inside of the lid. When the lid was screwed on, it distributed the glue enough so the bottles couldn't be opened. (The kids were trying to do so within minutes!)
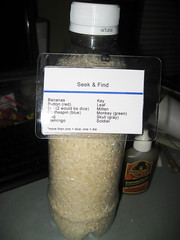 You could simply say "there are twelve (or ten, or fifteen) items in this bottle; find them." I went a step further and made up little color-coded cards and laminated them (using some old ID tag sheets), attaching them to the bottles with rubber bands.
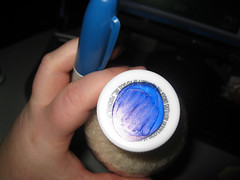 Finally, I used permanent markers to make dots that matched the stripes on the cards so the kids could match up the bottles to the cards if they became separated. I didn't designate a bottle per child; I figured they could just swap them back and forth until they were tired of them. As it was, my niece grabbed the red one, and nephew J. grabbed the blue one, and they were perfectly content to each "own" one, and share later.
 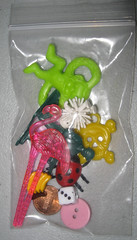 Want to try? I'll send this bag of ten assorted items to a commenter. I usually only get one response, if any, but just in case there are more, I'll draw a name from the comments on Wednesday afternoon. You'll just need to find a bottle, rice, glue, and any additional items you want to add.


5 comments:
That's so clever! Man, you're the best aunt ever! (wish you were mine!) I wonder if something like that would get me out of the bad-aunt hole I have recently slid into...
Also, I'm sorry I don't comment more! I need to get back into the commenting mode :)
I am totally stealing this idea for my cousin's 3 year old next year. She can play with it on the long car trip home.
BTW, I used another one of your ideas this year. I had to have an ornament for a swap and I made a "make your own garland" kit with string, a glue stick and punched out circles with holiday colors from ads and junk mail.
That is so cool. I have 8 kids I give Christmas presents too. I just might start saving up materials to make one of these for each of them.
Great tips. Thank you. We are making these as a craft for a church project.
Thanks for the great tips. We are making this as a church craft.
Post a Comment