Showing posts with label how to. Show all posts

Wednesday, March 3, 2010

Redux - Play Food: Felt Cherry Tuturial

Shamelessly reposting the occasional tutorial from my old blog. About three years ago, I had some kids in my life that I thought would get a kick out of play food. I gathered up a bunch of felt, embroidery floss and poly-fill (etc.) and made up quite an assortment. Following are the steps for making my favorites, the cherries. (Inspired by the second section on this page.)

Materials: Felt (I used a wool/poly blend in a splotchy red/black), .5 mm brown leather cord, embroidery floss, needle, scissors & filler (e.g. felt scraps, polyfill, etc.) Note: I really recommend felt with some wool content.

Play Food: Felt Cherry Tuturial
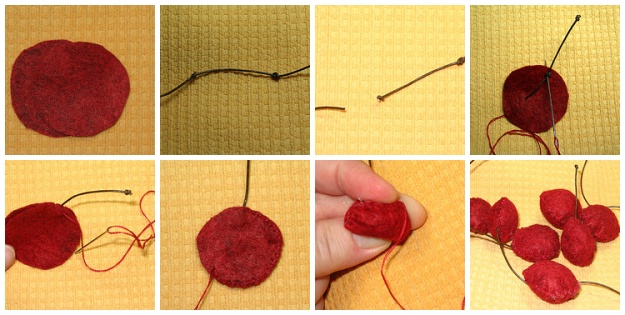
Top row, left to right:

  1. Cut 2 circles (1¼ - 1½") for each cherry.
  2. Don't cut the leather cord yet. First, tie a double knot about ½" from the end (don't need to be real precise - just need to have something to grab and pull), then about 2" from that, tie a single knot and pull TIGHT.
  3. Cut close to the second knot. This is the tip of the stem.
  4. Cut about a 15" length of embroidery floss and separate. I used 2 strands. Thread needle and tie a knot. Insert the needle through the first knot in the "stem" and push the needle through a single layer of the "cherry." Pull thread through. The 2 knots will be hidden inside of the cherry.
Second row:
  1. Lay the second layer over the first. Start sewing by stitching very close to both sides of the stem, then continue around the circle, using a tight whipstitch.
  2. Continue stitching until you're just a little past the halfway mark. Stop and stuff the cherry with felt scraps or polyfill. Sew shut.
  3. You could be done now, or you can take another step and SQUISH the cherries so they look a little rounder. Tip: if your cherries have some wool content, then you can mist them with a little water prior to the SQUISH, and they should dry in a somewhat round shape.
My method: I cut out a few sets of circles and followed all the steps up to sewing past the halfway mark (partway through step 6), assembly-line-style. I cut short pieces of floss on purpose: so I could just stop sewing and pick it up again later, without wasting a lot. Then, once I had a bunch, I'd stuff them and finish sewing them up.

For fun, I used parts of a felted wool sweater to make a huge, catnip-stuffed cherry for our cats. It was quite a hit. (Craft felt is not recommended for cat or dog toys, regardless of what they sell in stores. Take it from someone who has had a cat ingest and poop out an entire toy.)

Read More......

Saturday, February 6, 2010

Good Auntie: Candy-Dipped Pretzels

pretzels packedI'm trying something new this year. Now that we're living out in the country, we don't see my family very often - mostly birthdays and major holidays. I thought it would be fun for my niece & nephew to get regular mail from us: packages, cards, etc.

So, back in January, I started sending mail to the kids. Vaguely remembering being a kid, I figured that what arrived isn't as important as the fact that they're getting mail, so I've made liberal use of my "swap basket"; a large metal basket into which I toss things I find on sale that look interesting or things I might have received in a swap that I couldn't use. Of course, now that these packages are planned, I'm always on the look-out for more things to add to that basket!

For Valentine's Day, I made a batch of acorn brownies and sent those, along with some themed goodies. Except that I got into the whole thing a little early and had to send it a couple of weeks ago so the brownies wouldn't get stale!

I mailed a letter last week, and Valentine cards today. I woke up this morning, knowing that I had to make the candy-dipped pretzels I'd been thinking about doing off & on since I got a canister of pretzels along with a dish (I bought on clearance). I already had all the other ingredients. And today was the day. This is so easy! You need about 3 ingredients, some paper plates & bowls, a double boiler (or facsimile (see below for mine)) and some wax paper. Doing it this way (with disposable bowls & plates) made for very fast clean-up, too (about 90 seconds).

Candy-Dipped Pretzels
Ingredients: mini-pretzels, candy melts (I used <1 cup of white melts to make approx. 3 dozen pretzels), sprinkles (optional)

Other "equipment": double boiler, paper bowls & plates, plastic spoon, wax paper, treat bags & tape (if not self-sealing)

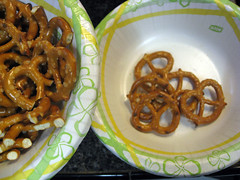
pretzels sortingFollowing package directions, start melting the candy. My double boiler consists of a small saucepan and a stainless bowl that sat on top - in enough to keep in steady, but out enough that it didn't get stuck). Inside the bowl, I added a paper bowl and a couple handfuls of candy melts.

While the candy is melting, sort your pretzels. Put the unbroken ones in a bowl and set the broken ones aside (these can be eaten as is, or broken up even more and added to some leftover candy and spooned onto wax paper (ever had a Pretzel Joy?)).

If sprinkles are desired, pour some into another small paper bowl. Not too much -- you won't use as much as you think -- enough to cover the bottom of the bowl about 1/4" thick.

Lay squares of wax paper on plates/cookie sheets. You won't want the pretzels to touch much once they're dipped.


pretzels dipping candyTurn the heat down a bit, so you can comfortably work near the heat, then dip the pretzels into the candy, covering 1/3 - 1/2. (Note: When I took this pic, I'd already dipped several pretzels and had to add a few more melts.)

If you're not adding sprinkles, skip the next step.

pretzels dipping sprinklesImmediately dip the candy-dipped pretzel into the sprinkles, moving it a bit to grab more of their colorful goodness.

pretzels settingPut the pretzel on the wax paper and pop in the fridge to chill for at least 10 mintues.

When you've dipped all the pretzels, try breaking up the remaining pretzels even more (not quite crushed) and stirring them into the remaining candy (unless it's a lot and you want to refrigerate it for later use). Spoon mounds of the mixture onto wax paper and chill.

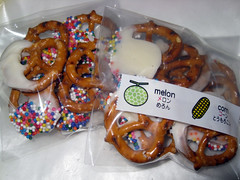
pretzels wrappedIf you're serving them, store in a container with an airtight lid. They should be okay for as long as regular pretzels would be if stored that way. If you're giving, package up. I stuck several (all "facing" the same way) into a treat bag and taped it shut with some fun Japanese tape that has fruits & veggies on it.

pretzels container done2_nonameI also took advantage of the container the pretzels came in and made a spiffy gift box, by punching a circle for the top and cutting a strip to go around it out of heavy-duty scrap-booking paper and gluing in place. I made a label using photo paper and faux-matted it with the same paper from the lid.

It's already boxed up to be mailed next week, along with some stationery supplies, in case the kids want to send mail back to their old auntie, or friends, etc. I made return labels for each, found fun patterned paper at the dollar store, and am sending a box of envelopes to share.

Read More......

Sunday, November 15, 2009

Giftmas Crafting Starts Early

09-stockings-hangingI made stockings for John & me about 4 years ago. They made the move - we used them last year - but I can't find them. It's a little early, but I have plenty of knitting to do for Giftmas, and I figured I should get this out of the way. Stockings are one of my favorite things about the holiday. It goes back to my mom (I think they were one of her favorites, too) -- she'd start collecting things for our stockings in January. After she died, the family tradition died as well, until John came into my life. Now, we exchange stockings the morning of Dec. 25th every year. So the old ones had to be replaced (if they turn up, we can always rotate.)

As luck would have it, I'd found the perfect material for the stockings, in the form of a (probably very scratchy) sweater I thrifted last winter. It was made up of hundreds of short pieces of yarn, so there was no way it was going to be unraveled & recycled. I felted it, but it didn't turn out as fabulously as I'd hoped. But, yes: perfect for stockings! Here's what I did, if you want to give it a go yourself.

09-stockings-materialsGet all of your materials together. You need a paper template (see notes at bottom), felted sweater, long straight pins (mine have the leaf topper) and scissors (sturdier ones than shown -- I ended up using a different pair than the one pictured). Not shown: sewing machine (you could also hand-sew, if you have the patience).


09-stockings-patternThe sweater was an adult small, and felted, was even smaller, so I couldn't quite get two stockings out of the body. I wanted our stockings to match as closely as possible, and I was lucky that the sleeves, taken apart and laid with right sides facing, were an exact fit for the template (I could also have just resized the template, but we each usually end up with a DVD in the stocking, so the right width was important). I put the two pieces together, right sides facing and pinned the template to the material in several places.

09stockings-sewingIt always seems like when I cut something out and try to sew it together, something shifts and it ends up uneven. So, I thought I'd be clever and sew around the template first, then cut it out. It worked pretty well, although it was a little tough to maneuver at times.

09stockings-sewnHere is the first stocking, sewn and cut out. (You can see why the sweater couldn't be unraveled.)

09stockings-finished1Turn right side out and kind of push the seams into shape. Our new ones need a tiny bit more attention.

Stocking #1 complete. (Pic of both stockings, pre-hanging. They look different because the sleeves and the body felted at different ratios. So one has a firmer, fuzzier fabric.)

When you're all done, add a loop for hanging. I used some random scrap yarn and crocheted a 4-5" chain, then used the tails to knot the loop firmly to the back edge of the stocking. Hang by the chimney (or wherever) and stuff with gifts at the appropriate time.


Notes: For the template, I did a Google Image search for "Christmas Stocking Template." As luck would have it, the first result was the shape I wanted.

Read More......

Thursday, October 22, 2009

Emergency Yarn Ornaments - Now in PDF form

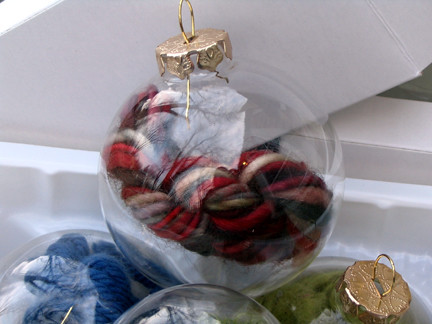
Knitter's Emergency OrnamentThis isn't new; it's a "pattern" (really a tutorial) I created a few years ago and posted on my old blog. But I've always meant to convert it to a PDF and make it available for download -- other things just always got in my way. Recently, people have been having trouble accessing the original blog post, so I finally got my butt in gear and finished the PDF. It's not perfect, but it's not that bad, either.

I originally called it the "Emergency Knitter's Ornament." I know of at least one person who did, indeed, break open the glass to get at the yarn. But she was nine and loved pretty yarn to knit with, so I cut her some slack.

Now, called "Emergency Yarn Ornament" (because "yarn" is shorter than "knitter's/crocheter's/weaver's/spinner's/dyer's"), the pattern is currently hosted on Ravelry as a free download. You should be able to obtain it using the following link:

download Emergency Yarn Ornament now

This is the ideal time of year to churn out a bunch of these. The clear glass ornaments are available at most "big box" craft stores and are frequently on sale.

Limitations: Only one store currently has permission to print and distribute copies of these (Nestucca Bay Yarns, in Oregon). Otherwise, making more than the necessary couple for personal use is a no-no. (Giving a copy to a friend who isn't online a lot is fine. Printing out stacks to hand out anywhere is not.) Store owners interested in an approved copy (with store logo added) to distribute should contact me. See PDF for the traditional copyright notice.

If you do make some, and are on Ravelry, please add them to your notebook. I really love seeing what other people turn out!

Read More......

Tuesday, June 16, 2009

Socks!

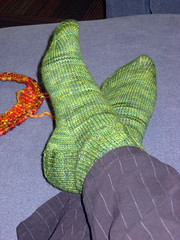
Smooshy Socks @ Lunch #2I've been knitting for about five years, and the idea of knitting socks both fascinated and terrified me at the same time, up until about a year ago. Some people start on socks as one of their first projects, some wait awhile. I waited a good long while!

I taught my friend, Anita, how to knit a couple of years ago, and she was knitting socks (two at a time!) within a year, while I was still intimidated. Then, I found a book that changed everything for me. Come to find out, with the right instructions -if socks are something that appeal to you - they aren't that hard or scary at all; in fact, they're downright magical. Wearing hand-knit socks is like having your feet hugged all day long.

I've found it to be rather difficult to knit socks for people when I can't see them a few times during the process and try them on, so I've declared that - from now on - I only knit them for John, myself, and babies.

Before I made that decision, I got some yarn to knit some socks for my friend Heather's birthday. I ordered three skeins, because she's kind of like an Amazon (tall! biggish feet (although if you took my shorter feet and multiplied by width, they're probably similar in size)), and I wanted a pair, too. We have matching tattoos, so matching socks (at least with the same yarn), would be no big deal. I got the bright idea to ask her if she wanted me to knit the socks for her, or if she wanted to learn herself. Woot! Off the hook: she wanted to learn how to knit socks.

It was a little late, but her "birthday" package arrived at her doorstep late last week. I combined the yarn with the book that demystified the process for me, and some other goodies, and sent it off. About 3 months late, but that's how we roll. Heather is ready to get started, so I sent her a big, long email with a bunch of tips. I figured I'd share it with you all as well, with some modifications for a broader audience.

The book I sent: Getting Started Knitting Socks. There are tons of tutorials online (including some with videos), other books, classes, etc. This is what finally made it all make sense for me. Your mileage may vary (YMMV). Heather already knows that the copy she got is one I already owned (not new). I misplaced my first copy, not long after purchasing, and had to go buy another. Of course, a few weeks later, the first book turned up in a drawer (I don't generally keep books in drawers).

TIP: Make a photocopy of the pattern you're going to use, and any supporting pages and pop those in your knitting bag, rather than carrying the book around. As long as you own the book, this is perfectly acceptable.

The yarn I sent is not the yarn she'll start with. This requires a size US2 needle (or thereabouts); pretty small for a first time. But it's fabulous, is it not?

I've suggested that she take a similar pattern for a baby sock, and use worsted-weight yarn to get a feel for the steps involved. This pattern - North Country Cotton Baby Socks (rav link) is pretty much identical to the basic pattern in the book, except for scale.

I've been pretty amazed to find that one can wear wool socks during the hottest days of summer, and have one's feet be the most comfortable part of one's body. The type of yarn I like to use is superwash wool with 20-25% nylon for added durability.


Please note that there are several methods of knitting socks, and each has its pros and cons - and fans. I'm introducing Heather to the most basic, top-down socks.

Stuff you need:

Pattern. There are some excellent free patterns online for beginners.

Notebook & Pen. I highly recommend making notes on something besides (or in addition to) your pattern copies. Why? Notebooks are a little harder to lose. I write down everything that might be different from the pattern so I'll remember for sock #2, or a future pair. Because I lost my notes from John's first pair (see!) I've been extra careful this time.

I make notes like: "7 spi, size 3 needles, DK yarn. CO 68 with MC, 4 rows 2x2, switch to CC, 4 rows, MC - 10 rows." Translation: 7 stitches per inch (actual name of pattern AND my gauge), needle size, yarn weight. How many stitches I cast on, and the pattern I work in (k2xp2 ribbing) I'm using 2 colors of yarn, so this reminds me where to add the stripes.

Needles. I am a huge fan of the Magic Loop method, and do one sock at a time, cuff-down, on one 32" circular needle. You can also use two shorter circs or a set of double-pointed needles (DPNs). I love the fixed circulars from Knit Picks (KP). They start around $4.99 a pair for the metal ones, and the cables are plenty flexible for Magic Loop (more on that later).

Be careful when ordering from KP - they list two size 2 needles (for example), but if you look, the size given in mm is different. The first is a US2, the next would be considered a 2½.

Gauge. Even if you're one of those people who always gets the gauge printed on the ball band, you're going to need to knit up a small swatch in the round, to find out your gauge. Most sock yarn bands list a range of gauges for a range of needle sizes. When you knit in the round, you have a slightly different tension than when you knit flat.

Stitch markers. Most sock patterns are written for DPNs. I use stitch markers to indicate where the yarn would be divided on needles, and just pretend. I mark the end of the round with a double-ringed marker, which makes it very easy for me to figure out where I left off if I was in a decrease (or increase) row. You put it on the first loop when you're on a decrease row, and the second loop for the one after that (always plain knitting). Very simple.

Row counter. You need something to keep track of your rows. For some parts of the sock, I just go by length, but in other areas (like the heel flap), you need to count rows. There are many different kinds. You can get one of the clicky kind at the craft store (use a coupon - they're like $11!), one that hangs from your knitting where your roll a small dial, or just make marks on a piece of paper. (You'll want to take notes anyway.) Another way is to link a series of rings together, and move to the next loop on every row (like these) There are even bracelet kinds, but I haven't made or used one.

Notes on Techniques
  • Magic Loop (ML) method. I learned Magic Loop by watching a video on KnittingHelp.com (Advanced Techniques - scroll down to "small diameter circular knitting" - it's the third item). I haven't seen the video that KnitPicks has on their site (might even be the same one). If you do ML, you must have circular needles with a long and thin/flexible cable.
  • Picking up stitches. Probably the toughest part, and it's not really that hard. Just don't get too far ahead of yourself and you'll be fine. One thing at a time.
  • Toes. Everyone goes on and on about the Kitchener graft. They either love it, hate it or are afraid of it. Count me in among the haters. I just do a gathered toe (back of the book), like at the top of a hat, then turn the sock inside out and make sure I weave in the ends really well. If John can't destroy the toe, I think it's fairly safe.
  • Cuff. I have big ankles, but even when my socks fit comfortably, I tend to scrunch the sock down. I figure, why spent a whole lot of time knitting a long leg/cuff when it's going to end up bunched around my ankle? I usually do about 3" of ribbing, then a few rows of st st before I start the heel flap. If you have more slender ankles, or like longer socks, just knit longer before you start the heel flap.

This is just one person's view of knitting basic socks. YMMV.

Read More......
Friday, March 6, 2009

Padded Envelope Tutorial

It usually only takes one request to get me to write a tute, so since persephony4 responded to the previous post with a Yes, please, that's my cue.

These really do well as an assembly-line project; by the time you've finished gluing several, the first one should be dry and ready to fold. Apologies in advance for the lack of measurements. I really just eyeballed the whole thing.
Click any image to view it at a larger size.

pe_materialsMaterials
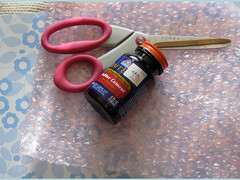
Scissors
12x12 scrapbook paper - regular weight
Bubble wrap (I save bits and pieces from other packages, you can also buy it at the Dollar Store)
Rubber Cement


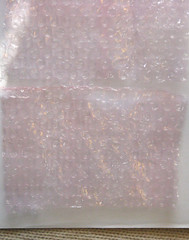
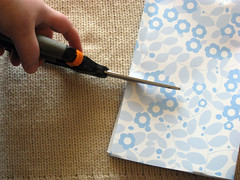
pe_cut wrapStep 1: Cut up the bubble wrap. For each envelope, you need 2 pieces, roughly 4x6".

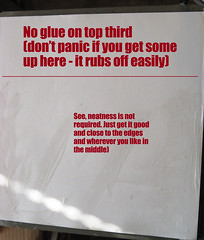
pe_glueStep 2: On the reverse side of the scrapbook paper, brush on the rubber cement. Leave the top third alone. On the bottom two thirds, brush at least a 1" wide strip down the sides and across the bottom, then just randomly swirl your brush across the middle. Just a little glue will hold the bubble wrap in place -- it's more important that the edges seal well.

pe_lay wrapStep 3: Lay the bubble wrap, flat side down/bubble side up, 1-2" from each edge as shown.

Step 4: The fun part (not really); wait for the glue to completely dry. When you coat two surfaces with the cement and let them dry before sticking them together, the bond is pretty close to permanent. If you lay the sides together while the glue is wet, the bond is temporary.

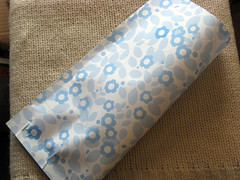
pe_fold1Step 5: Fold. I take the bottom corners and line them up as best as I can, then gently press the edges together, finally running my fingers down the center to crease it.

Remember that now the glue is dry, it's not very forgiving. So be careful, but don't stress out too much: it's hard to make it exact no matter what, with the extra bulk in the center. You can see that for the demo, I had some creases. It's not the end of the world.

pe_fold2pe_crease

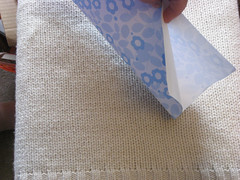
pe_flap1Step 6: If you left the top third or so free of glue, you should now have a flat tube of sorts, sealed at the bottom and 2/3 of one side (with the fold in the middle).

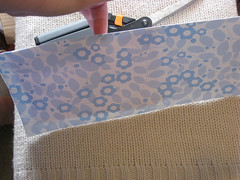
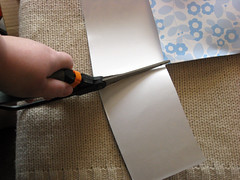
pe_cut1Now, figure where you want the top of the envelope to be and cut across one layer (I usually cut around the 7" mark).

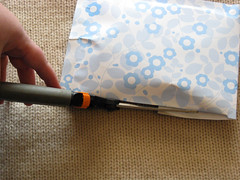
pe_cut2Then cut down the center to the horizontal cut and remove the rectangle.

pe_trimStep 7: Fold down the flap, then look for any white edges and trim.

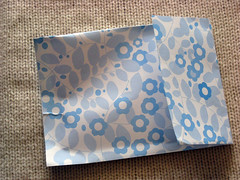
pe_finishedIf you want to be extra sure of the edges, secure in a couple of spots with some clear packing tape. When you're ready to mail, add your small items and tape the flap shut.

Read More......

Sunday, December 28, 2008

Making Seek & Find Bottles

Sort of a tutorial. There are others out there -- I linked to at least one when I did Crafty Fun Fridays (old blog) -- but I've been in a picture-taking mood, so you get my version as well. I've been meaning to make some ever since I first posted, and have been stashing small items with the project in mind, but never got around to it. A few weeks ago, I went to a baby shower where one of the games was a bottle like these (except it was a giant baby bottle and filled with baby-themed items). Long after the time was up, the guests were turning the bottles back & forth, trying to check everything off the list.

For Christmas, I wanted to give these to my niece and nephew, hoping that I hadn't waited too long and that K, my 10-year-old niece, wouldn't think them too childish. They actually enjoyed them, and I have a few lessons learned to share along with the photos I took during the making.

seeknfind1_materials1Gather Materials
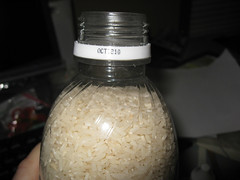
Clear plastic bottle with wide mouth. (I used a large Aquafina bottle.) Drink the water, remove the label, rinse and make sure it's dry as a bone -- bottle and lid.

Cheap/stale rice. No sense using the good stuff; it's not going to be eaten later! (I got 3-lb. bags for $2 ea. at Big Lots.) This size bottle took about 2 lbs. each.

Small toys (more on that later).

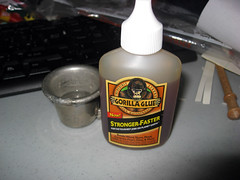
Glue (I used Gorilla Glue, because it's what we had.) You don't want the kids opening the bottles and spilling rice everywhere! (Plus, many of the toys are choking hazards.)

Tools: scissors & funnel

Optional: Permanent markers to color-code bottles, if desired; cards to list items; rubber bands; hole punch (for cards)


seeknfind3_toys1About the toys
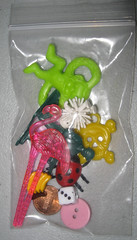
Gather a bunch of smallish non-perishable items (Close-up). Some regular household items will also work.

Lessons learned: the tiny diary-size key was too small and couldn't be found in either bottle, by children or adults. The bee bead turned out to be the exact color of the rice and was also not found by children or adults. Truly white items (like the dice) worked out okay. Too long items (like the huge paper umbrella) aren't a great idea (but the flamingo was fine). I don't recommend foam items (like the leaf).

If you're going to make a list, make sure all the items fit through the bottle opening first. The monkeys had to be forced in (because I'd already made the lists and laminated them!). Keep toys away from tiny tots until they're safely sealed inside the bottles!

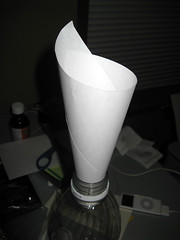
seeknfind5_funnelSnip a corner off the rice bag, and using a funnel (plastic or an improvised paper one), pour a few inches of rice into the bottle.

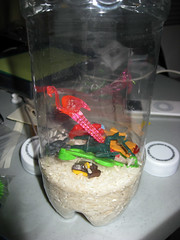
seeknfind6_addtoysThis picture shows another lesson learned: rather than stopping at one point and shoving all of the toys into the bottle like I did, add one or two every inch or so. You'll have less work trying to get things redistributed.

seeknfind7_fillThe amount of rice in the bottle dictates the difficulty level. I wouldn't go higher than this point, but if you wanted to make it easier, you could stop about an inch earlier.

seeknfind8_glueGlue the cap onto the bottle. As mentioned previously, I used Gorilla Glue. To do so, I moistened the outside of the bottle, where the lid would screw on, with just a bit of water on my fingertip, and applied 3 tiny drops of glue on the inside of the lid. When the lid was screwed on, it distributed the glue enough so the bottles couldn't be opened. (The kids were trying to do so within minutes!)

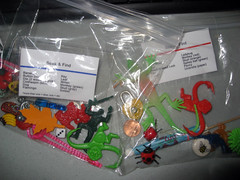
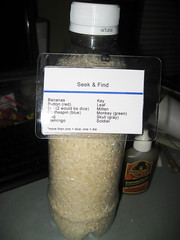
seeknfind9_finishedYou could simply say "there are twelve (or ten, or fifteen) items in this bottle; find them." I went a step further and made up little color-coded cards and laminated them (using some old ID tag sheets), attaching them to the bottles with rubber bands.

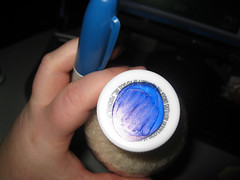
seeknfind2_materials2_capFinally, I used permanent markers to make dots that matched the stripes on the cards so the kids could match up the bottles to the cards if they became separated. I didn't designate a bottle per child; I figured they could just swap them back and forth until they were tired of them. As it was, my niece grabbed the red one, and nephew J. grabbed the blue one, and they were perfectly content to each "own" one, and share later.

Seek n Find - PrizeWant to try? I'll send this bag of ten assorted items to a commenter. I usually only get one response, if any, but just in case there are more, I'll draw a name from the comments on Wednesday afternoon. You'll just need to find a bottle, rice, glue, and any additional items you want to add.

Read More......
Thursday, December 25, 2008

Christmas Strata: a Photo Essay

We have this every Christmas morning, occasionally for Easter brunch or house party breakfast, but typically it's a Christmas thing. (Download with only 1 image at Google Docs.)

strata3_ingredientsIngredients
• 12 slices bread (I use multi-grain)
• 6 eggs
• 1 lb. bulk sausage (not shown)
• ½ stick unsalted butter (don't melt it yet)
• 2 c. shredded cheese (lowfat okay; don't use fat-free)
• 1 can evaporated skim milk
• ¼ t. dry/ground mustard
• ½ t. salt

Also: 9"x13" glass baking dish, large mixing bowl


strata2_sausageBrown the sausage and break it up well. While it's cooking, follow the next few steps.

Note: you can use other meats, or go meat-free, but may need to adjust the amount of butter used. The original recipe called for ¾-1 stick of butter, plus the amount used to butter the dish, but we've found that it's far too much when using sausage.

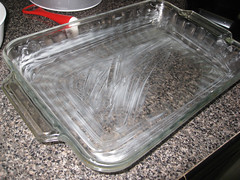
strata1_panButter the dish using the amount set aside for the casserole, then melt the remainder.

(I've used this same casserole pan for at least ten Christmases.)

strata4_breadCube the bread & toss it into the large mixing bowl.

(I just got this bowl, and love it!)

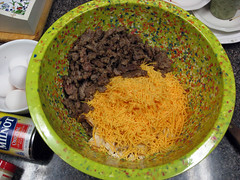
strata5_bread&cheeseDrain the sausage and add it and the cheese to the bread.

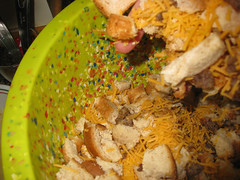
strata6_toss1Toss the bread, cheese and sausage.

I use my hands because it's not nearly as messy as an upcoming step.

strata7_liquidIn a separate bowl, beat the eggs until foamy. Add evaporated milk, salt and mustard; mix well.

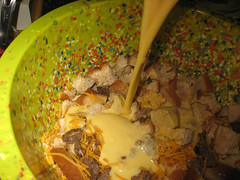
strata8_addliquidPour the egg mixture over the bread mixture.

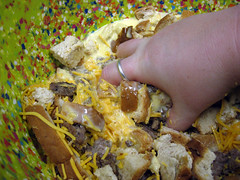
strata9_mixThoroughly mix.

Wow, that is a very unflattering angle for my hand (which is fat, but not really shaped like that).

strata10_in panDump mixture into buttered pan and pat mixture into corners.

Then, wash your hands.

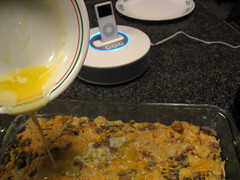
strata11_butterPour butter over assembled strata, then cover tightly and refrigerate overnight.

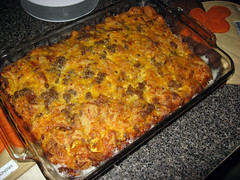
strata13_finishedIn the morning, or at least several hours later, preheat oven to 325ยบ and bake for one hour.

strata14_serveWe usually serve it with canned peaches. Not sure why... we just always have.
Read More......