Showing posts with label crafts. Show all posts

Sunday, November 15, 2009

Giftmas Crafting Starts Early

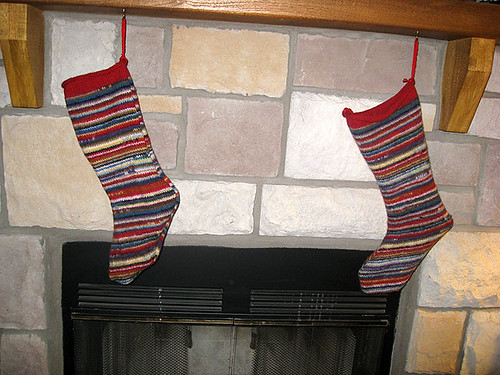
09-stockings-hangingI made stockings for John & me about 4 years ago. They made the move - we used them last year - but I can't find them. It's a little early, but I have plenty of knitting to do for Giftmas, and I figured I should get this out of the way. Stockings are one of my favorite things about the holiday. It goes back to my mom (I think they were one of her favorites, too) -- she'd start collecting things for our stockings in January. After she died, the family tradition died as well, until John came into my life. Now, we exchange stockings the morning of Dec. 25th every year. So the old ones had to be replaced (if they turn up, we can always rotate.)

As luck would have it, I'd found the perfect material for the stockings, in the form of a (probably very scratchy) sweater I thrifted last winter. It was made up of hundreds of short pieces of yarn, so there was no way it was going to be unraveled & recycled. I felted it, but it didn't turn out as fabulously as I'd hoped. But, yes: perfect for stockings! Here's what I did, if you want to give it a go yourself.
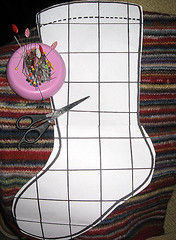
09-stockings-materialsGet all of your materials together. You need a paper template (see notes at bottom), felted sweater, long straight pins (mine have the leaf topper) and scissors (sturdier ones than shown -- I ended up using a different pair than the one pictured). Not shown: sewing machine (you could also hand-sew, if you have the patience).
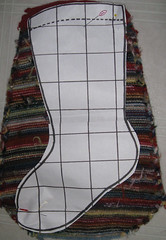

09-stockings-patternThe sweater was an adult small, and felted, was even smaller, so I couldn't quite get two stockings out of the body. I wanted our stockings to match as closely as possible, and I was lucky that the sleeves, taken apart and laid with right sides facing, were an exact fit for the template (I could also have just resized the template, but we each usually end up with a DVD in the stocking, so the right width was important). I put the two pieces together, right sides facing and pinned the template to the material in several places.
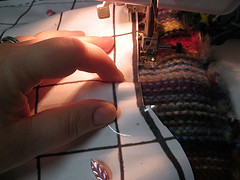
09stockings-sewingIt always seems like when I cut something out and try to sew it together, something shifts and it ends up uneven. So, I thought I'd be clever and sew around the template first, then cut it out. It worked pretty well, although it was a little tough to maneuver at times.
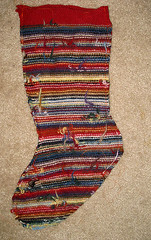
09stockings-sewnHere is the first stocking, sewn and cut out. (You can see why the sweater couldn't be unraveled.)
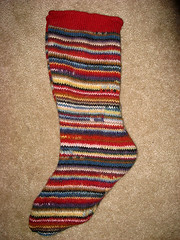
09stockings-finished1Turn right side out and kind of push the seams into shape. Our new ones need a tiny bit more attention.

Stocking #1 complete. (Pic of both stockings, pre-hanging. They look different because the sleeves and the body felted at different ratios. So one has a firmer, fuzzier fabric.)

When you're all done, add a loop for hanging. I used some random scrap yarn and crocheted a 4-5" chain, then used the tails to knot the loop firmly to the back edge of the stocking. Hang by the chimney (or wherever) and stuff with gifts at the appropriate time.


Notes: For the template, I did a Google Image search for "Christmas Stocking Template." As luck would have it, the first result was the shape I wanted.

Read More......

Thursday, October 22, 2009

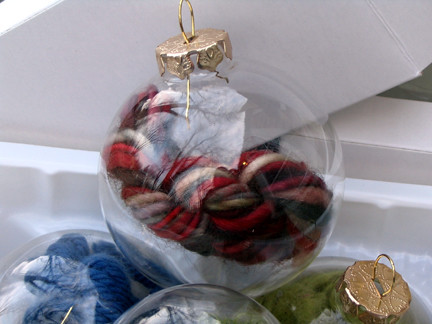
Emergency Yarn Ornaments - Now in PDF form

Knitter's Emergency OrnamentThis isn't new; it's a "pattern" (really a tutorial) I created a few years ago and posted on my old blog. But I've always meant to convert it to a PDF and make it available for download -- other things just always got in my way. Recently, people have been having trouble accessing the original blog post, so I finally got my butt in gear and finished the PDF. It's not perfect, but it's not that bad, either.

I originally called it the "Emergency Knitter's Ornament." I know of at least one person who did, indeed, break open the glass to get at the yarn. But she was nine and loved pretty yarn to knit with, so I cut her some slack.

Now, called "Emergency Yarn Ornament" (because "yarn" is shorter than "knitter's/crocheter's/weaver's/spinner's/dyer's"), the pattern is currently hosted on Ravelry as a free download. You should be able to obtain it using the following link:

download Emergency Yarn Ornament now

This is the ideal time of year to churn out a bunch of these. The clear glass ornaments are available at most "big box" craft stores and are frequently on sale.

Limitations: Only one store currently has permission to print and distribute copies of these (Nestucca Bay Yarns, in Oregon). Otherwise, making more than the necessary couple for personal use is a no-no. (Giving a copy to a friend who isn't online a lot is fine. Printing out stacks to hand out anywhere is not.) Store owners interested in an approved copy (with store logo added) to distribute should contact me. See PDF for the traditional copyright notice.

If you do make some, and are on Ravelry, please add them to your notebook. I really love seeing what other people turn out!

Read More......

Sunday, July 5, 2009

Born on the 4th of July

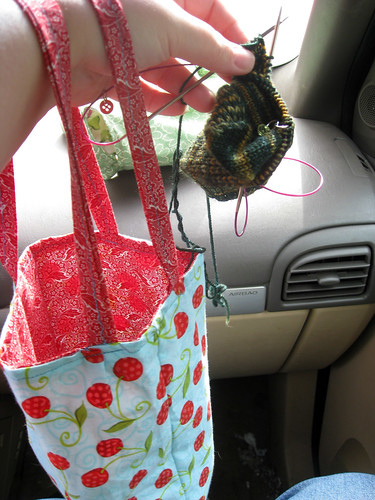
New Sock Bag in use
I did a little sewing on Saturday morning. I wanted to take a little gift to the daughter of the people we were going to be seeing at a pro-freedom rally/tea party protest, and I really needed a small sock bag that I could hang from my wrist while I wandered around. At some point, I'll try a drawstring version, but I liked this one just fine.

I stitched up two bags before we hit the road:

  1. The one shown above was made using one of my favorite cherry prints (I hoard those pieces!). For the lining, I used a nifty red print from Jennifer/Feltmouse (I won a contest on her blog ages ago -- haven't done a lot of sewing since, but I'm ready to start working through it). I made it long, and kind of deep, so it holds a small notebook, a big ball of sock yarn and a sock-in-progress. During the event, I also managed to cram a bottle of water and my camera in there, along with some literature. Now, it's back to just holding the notebook, yarn & sock.
  2. The green one, which you can see on my Flickr page, was made using some really cool green vintage fabric that reminded me of strawberry leaves (the recipient loves strawberries), also received from Feltmouse; for the lining I used a fruit print that I had in my stash (second from right, here).
I'd love to talk about the event, but I need some time to collect my thoughts. There were three excellent speakers, but the remaining speakers veered way off the course of pro-freedom discussion. In every other way, it was a great day; I met some fascinating new people and even got to take some video that John may use in an upcoming Think Twice News episode. After we got home, when it started getting dark, we were treated to a pretty decent backyard fireworks display (our neighbors had a professional set-up). It's a short video:


On Friday, I visited a local cemetery with KarenD. I'll be posting pics to my Flickr account in the next couple of days (need to do some resizing).

Read More......

Monday, June 15, 2009

Oh, so many things

I've had many things to blog about, but not so much the energy or time. So a few short blurbs (light and funner stuff first):

Crafty & Stuff
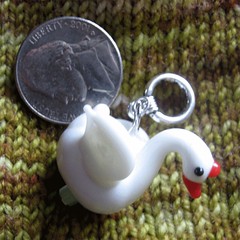
Glass Swan Stitch Marker

  • If you get the joke, you may want one of these stitch markers: Glass Swans. They are not truly suited for practical use, but are truly fun to have and giggle at. Available in my shop.
  • A new online knitter's magazine just launched (as in last night or this morning): Petite Purls. Focus is on adorable patterns for small children; the first issue has a knitted lobster toy that either gender would enjoy.
  • I'm about a third of the way finished with the second sock of the pair I'm knitting for John. Sock #1 fit perfectly (woot!) and I believe I'll meet my goal of having these done by Friday. As soon as the pair is done, I've promised something for a charity as part of knitalong on Ravelry. Then, maybe a pair for me again.
Fast & Furious
I've had the 'flu for past couple of days. Woke up Saturday, around 4 AM with what may have been a "regular" migraine, but it could also have been a precursor to the illness. As the day dragged on, I felt less and less okay; until, by mid-afternoon, I was quite ill. Sunday was a day of many naps and lots of DVD-watching and knitting. Today, I'm not at work, because I still have very little energy and my fever kept coming back last night and I hate people that show up to work with fevers (frequently means contagious). I'm pretty confident that I'll be fever-free tomorrow and able to walk the two blocks from my parking lot to my building!

Crisis Averted
We have had a small leak in the basement from the floor above for some time. At first, we thought it was just condensation from the air conditioner; however, once we had a dehumidifier running non-stop, it didn't get any better. So John contacted the home warranty company, and they had a plumber out the next day. There was a crack in the hot water main! Not covered, sadly, for convoluted reasons, but cheap to fix considering the alternative (if it broke wide open)! That wouldn't have been covered either.

So Confused (and this won't help a lot)
You may have noticed that I edited the two posts related to the ad debacle. Well, the ads are staying down, but things have gotten, shall we say interesting(?), and I've had to contact a lawyer. What's frustrating is that I thought everything was resolved, and several days later got a series of emails from official channels, opening up an ever bigger can of worms. People really need to get the whole, up-to-date story before they try to dive in and "help." You know?

Next: Back to Sheena's. It would be a way-too-long post (again) if I included that.

Read More......

Saturday, March 28, 2009

If I only had a gumball machine

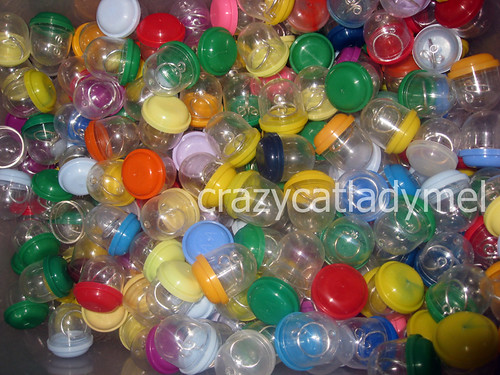
It started with this:

I think I have a plan for these

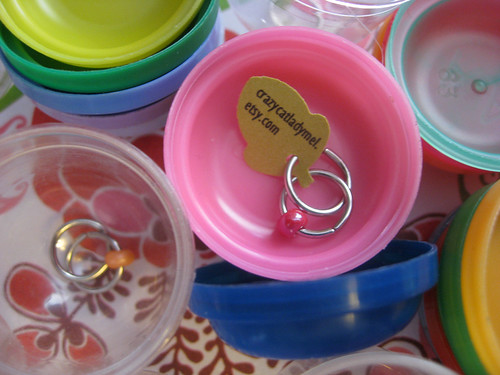
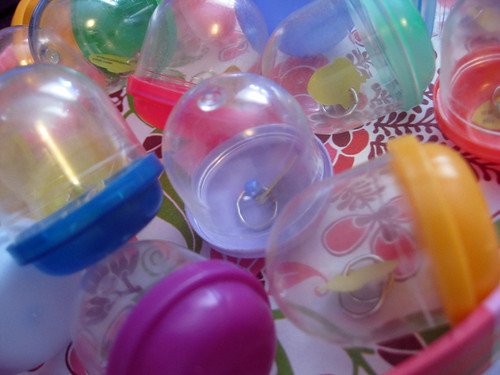
I picked up what turned out to be close to 300 of these little gumball capsules while thrifting. Each contained a very cheap toe ring - most of them identical - and I got a pretty ugly blister on my right index finger prying them open. I quit just past the halfway point, because of the blister, but also because I hadn't quite worked out how to do what I wanted. (I knew what I wanted to do: they would have to contain stitch markers, of course.)

The challenge was going to be tagging the stitch markers! I was patient, while my finger healed, and continued to make markers for the shop while I pondered the situation. This morning, I took a peek inside my punch drawer and spotted the little acorn, and set about tagging a set of markers while I tried to catch up on Ghost Whisperer. (Thank goodness for torrents, because CBS doesn't have anything on their site except clips, promos and webisodes!)

Anyway, without further ado:

stitch markers in capsules in progress1

stitch markers in capsules3

I love it when a plan comes together! These will make great knit night gifts or party favors, don't you think?

I'll also be selling batches of the gumball capsules the way they came, with the cheap toe rings, if anyone is interested.

Read More......
Saturday, March 7, 2009

Scrapbook Paper Possibilities

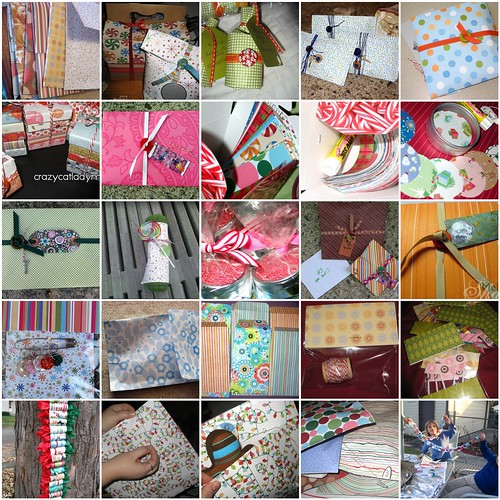
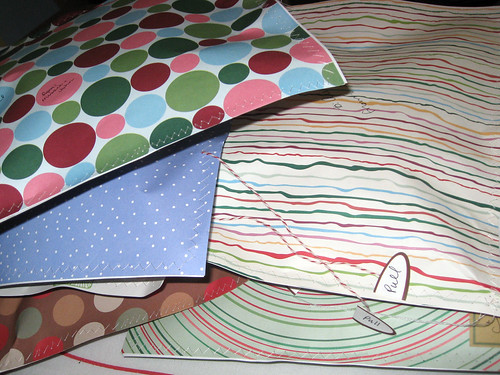
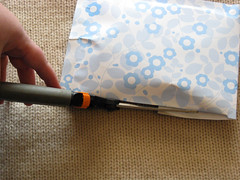
Oh, what you can do with a pad or two of scrapbook paper -- that has nothing to do with scrapbooking! I mentioned in a previous post that I might do a collage of all the things I've done with the 2 pads of 12x12 paper that I got on sale a couple of years ago. This is what I have pictures of -- a couple projects were done with other papers, but either have also been done with the big set or could easily be:

Scrapbook Paper ProjectsRow, by row, starting at the top left square:

1. Padded Envelopes,
2. Gift-wrapping,
3. Five Things: Acorns,
4. Small swap parcel,
5. Small birthday gift,
6. Matchbox Bundles,
7. Swap Package,
8. Paper Chain kit1, (see #25)
9. Paper Chain kit2,
10. Christmas Garland Kit,
11. Swap parcel,
12. Birthday Gift,
13. Valentine Swap, (like #10)
14. Swap parcel,
15. Buttonties7,
16. Doorprize1 ,
17. Padded Envelopes2,
18. Deed Envelopes,
19. Bakers Twine1,
20. Cupcake Flags,
21. Advent Calendar,
22. Gift Pouch1,
23. Gift Pouch2,
24. Pile o' Pouches,
25. Paper Chains

Read More......

Friday, March 6, 2009

Padded Envelope Tutorial

It usually only takes one request to get me to write a tute, so since persephony4 responded to the previous post with a Yes, please, that's my cue.

These really do well as an assembly-line project; by the time you've finished gluing several, the first one should be dry and ready to fold. Apologies in advance for the lack of measurements. I really just eyeballed the whole thing.
Click any image to view it at a larger size.

pe_materialsMaterials
Scissors
12x12 scrapbook paper - regular weight
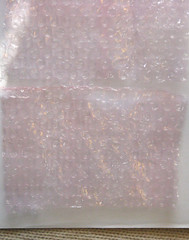
Bubble wrap (I save bits and pieces from other packages, you can also buy it at the Dollar Store)
Rubber Cement


pe_cut wrapStep 1: Cut up the bubble wrap. For each envelope, you need 2 pieces, roughly 4x6".

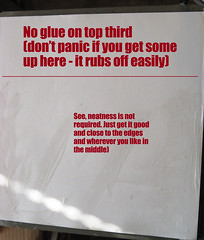
pe_glueStep 2: On the reverse side of the scrapbook paper, brush on the rubber cement. Leave the top third alone. On the bottom two thirds, brush at least a 1" wide strip down the sides and across the bottom, then just randomly swirl your brush across the middle. Just a little glue will hold the bubble wrap in place -- it's more important that the edges seal well.

pe_lay wrapStep 3: Lay the bubble wrap, flat side down/bubble side up, 1-2" from each edge as shown.

Step 4: The fun part (not really); wait for the glue to completely dry. When you coat two surfaces with the cement and let them dry before sticking them together, the bond is pretty close to permanent. If you lay the sides together while the glue is wet, the bond is temporary.

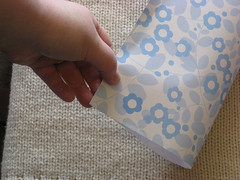
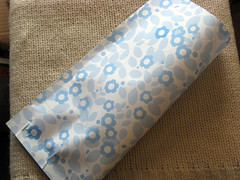
pe_fold1Step 5: Fold. I take the bottom corners and line them up as best as I can, then gently press the edges together, finally running my fingers down the center to crease it.

Remember that now the glue is dry, it's not very forgiving. So be careful, but don't stress out too much: it's hard to make it exact no matter what, with the extra bulk in the center. You can see that for the demo, I had some creases. It's not the end of the world.

pe_fold2pe_crease

pe_flap1Step 6: If you left the top third or so free of glue, you should now have a flat tube of sorts, sealed at the bottom and 2/3 of one side (with the fold in the middle).

pe_cut1Now, figure where you want the top of the envelope to be and cut across one layer (I usually cut around the 7" mark).

pe_cut2Then cut down the center to the horizontal cut and remove the rectangle.

pe_trimStep 7: Fold down the flap, then look for any white edges and trim.

pe_finishedIf you want to be extra sure of the edges, secure in a couple of spots with some clear packing tape. When you're ready to mail, add your small items and tape the flap shut.

Read More......

Wednesday, February 18, 2009

Never too early

Mantle: Feb 14, 2009My mantle, 15 Feb. 2009

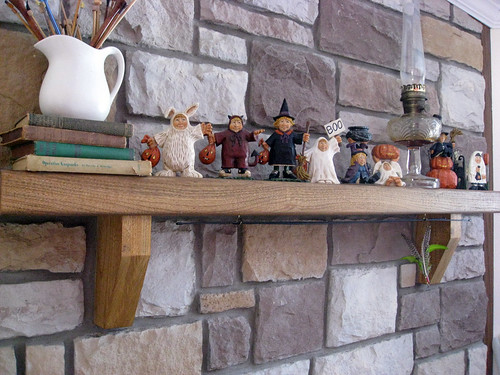
Oh my, yes. Some of my year 'round Halloween decorations are up! These are our David Frykman (resin) sculptures, which we started collecting after our first trip to Hell, MI, where we bought the little devil trick-or-treater. I think the library, with its red accent wall and black bookcases will become the room that always has Halloween decorations up!

Seen 'n Find Bottles
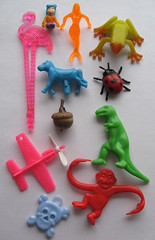
seek n find bottle for little onesI wanted to give a seek 'n find bottle to the daughter of some new friends, but she's a little 'un (~2 y.o.), so the printed card would not do.

Instead, I laid out the toys - on a sheet of paper - in a rectangular area and took a picture, which I printed and slid into a plastic sleeve. When I filled the bottle, I stopped a few inches down so there was more room for the rice to slide around, making the toys easier to find. A smaller bottle would have been better (the 1 liter size ends up being kind of heavy), but we didn't have anything with a large enough opening to fit all the toys through.

Read More......

Tuesday, February 10, 2009

Is it love?

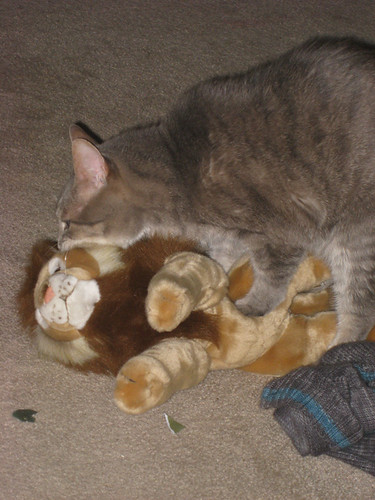
sheldon loving lion toyA while back, I posted about Sheldon's love for a particular skein of peach acrylic yarn.

Well, that yarn is looking pretty ragged, so I joked to John on Sunday that I would put out a stuffed animal and see if Shel would take an interest. I selected the lion - obviously male, but with more bite-able area - and set it in the library (or the room that will become the library). The funny thing is, Sheldon never does what I want him to do. In fact, the more time and effort I put into a toy, the less they're interested. So, imagine my surprise when, last night, John spots him dragging the lion around.

It was one of those rare times when I had my camera nearby (always seems to be in my purse on the other side of the house when the cats do something picture-worthy) and I managed to get one good picture.

I wonder how long it will last?


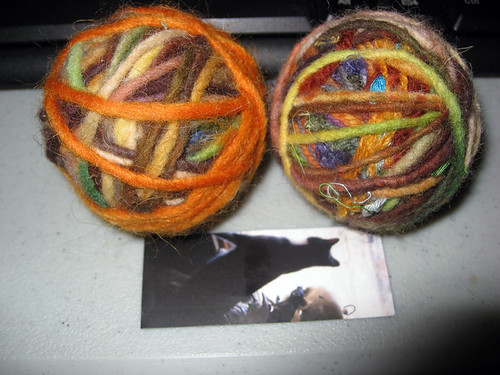
cat toys felted ballsSpeaking of cat toys and effort... Back in August, I posted about an idea I had to adapt a project (for a child's toy) and make kitty-size toys. Well, I did, almost right away. They were met with a mild interest, but were not favorites. When we went back to the house on Saturday to pack up some more stuff, I spotted them and tossed them in a box. Right now, they're marinating in a baggie with a couple tablespoons of catnip. Maybe that will help. (Moo mini card for scale.)

It has nothing to do with the toys themselves. It's their usual pattern: paper bags, boxes, pen caps and milk jug rings are infinitely better than any handmade or store bought toy. Exceptions: the laser pointer and one weird little green mouse that came in a stocking full of mice.

I didn't throw them in the washer to felt all the way, because I liked the texture that a partial needle-felting gave. It's a fun way to use up scraps, if nothing else!

If you want to try this, but don't have cats (or small kids) around, check out Make Your Own Wool Dryer Balls for another application.

Read More......

Sunday, February 8, 2009

Lost & Found

I make this kind of post a lot, it seems!

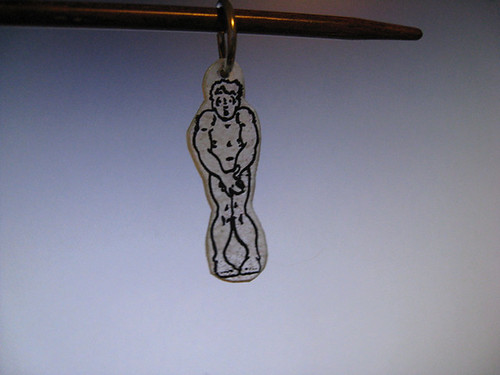
nekkid guy stitch marker1Back when I did Ren Faires a lot, and made collections of favours (for people to pass out), I made some little guys like this to be a bonus for customers. I wanted to make more as stitch markers a few months ago, but could not find the box of stamps anywhere!

It actually made me quite sad, because I couldn't find a place to buy him online (nor could I remember the co. that made the stamp). When we were packing up stuff in the garage at the old house, I found a tote full of most of my stamps. Oh, so that's where they went! Right on top? Nekkid guy.

So, stitch markers have been made, and will hopefully be inserted into my Etsy shop (empty at the moment) later this week.

Making them with a gas oven instead of a tiny toaster oven was interesting. First thing that happened: they all flipped over and baked upside-down. Amazingly, I only lost 3 because of that. Next load from the old house will include my old toaster oven!!

Halloween Stuff
Y'all know I love Halloween the most, right? Well, after adding a bunch of books to my wish list, I set about making my first Listmania! List on Amazon: Grown-up Halloween. I know right where my box of Halloween books is, so I might be adding to it as I get that unpacked. Sadly, however, I can't recommend most of the books I own.

My Halloween links site is down right now, thanks to Comcast's so very smooth transition. They promised a seamless transition for movers. What did we get? They deleted all of our web accounts and content. I hope to be rebuilding it in the next few days.

Read More......

Tuesday, January 6, 2009

Little Toy Drawer

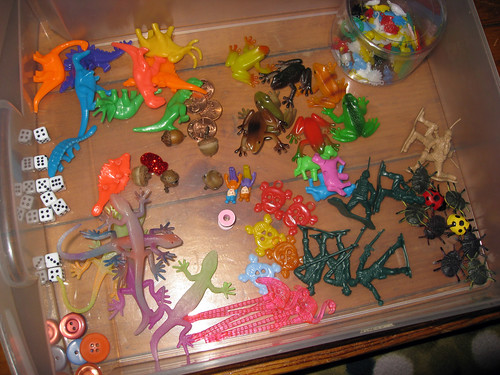
toy drawerSince I decided to give all 3 commenters a prize for last week's Seek n Find "contest," I figured I needed to get all the little toys together. (Every time I needed them, I couldn't find the darn bag.) Now they all live in a drawer together. Colorful, but most important, I know where they are!

Read More......

Sunday, December 28, 2008

Gift Parcels in Action

pile of parcels
Some friends are on their way here to celebrate Christmas with us. I spent a good portion of yesterday finishing up a couple of gifts and wrapping everything. We went from an estimated twelve people total (including us) to four, so it will be a quieter and calmer afternoon than anticipated. Some of the items are crafty, and many are wrapped in my new gift parcel method, which, apparently, requires a blog post.

  • Jdub is getting Firefly on DVD, plus an IOU for a Jayne hat -- if she wants one (I try not to knit surprises anymore).
  • Her husband, M, is getting the surgical scrub caps mentioned previously.
  • The kids are getting knitted hats (some pictured in the parcel how-to post), although they won't be here to open them.
  • They'll be taking back gifts for another family, who couldn't make it, including a tote bag and an IOU for a finished pair of socks:

    C Tote1
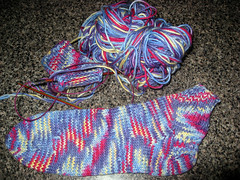
    beck's socks in progress

Gift Parcel for MClose-up of a parcel (I sewed them all closed -- really like the look!)

Read More......

Friday, December 26, 2008

Gifts by Request

Occasionally, I receive thinly veiled hints or direct requests for Christmas gifts. I like this very much... as long as what's being requested is something within my scope of experience (and the person is someone I would be giving a gift to). I would much rather give someone a gift I know they want! A couple of years ago, Jdub asked for bouffant-style scrub caps, and I delivered. A few months ago, she told me that her husband needed some too, but a different style. She said this would be an ideal gift for him, because he was sick of using the paper ones, so I asked her to get me a sample to work with.

She delivered a single paper cap, similar to the one pictured here (pulled from online; I have no idea who this model is).


scrub hat prototypeI very carefully took apart that paper hat and traced the pieces onto the backside of some sturdy gift wrap, then made a prototype.

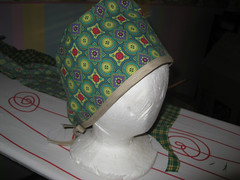
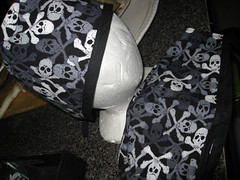
scrub caps doneAfter a lot of trial and error, I finished two scrub caps last night. It was close -- after the prototype, I was sure I had it down, so I cut out pieces for two hats, only to find that the resulting hats were too small. Back to the drawing board! Luckily, the third hat worked out okay, so I cut the final one and it was perfect. I don't think there is enough of this fabric left for one hat. Whew! (So, I made four hats, not counting the prototype, but only two will work for this gift.) On the off chance that someone who knows Jdub's hub sees this, please don't say anything to him. He won't see the hats until Sunday afternoon!

I sent a quick camera-phone pic to Jdub last night and she is sure he'll love them. Double whew! Christmas with that group is this coming Sunday. I have most of the gifts done, but only one is wrapped. Two more gifts to make. I'd better get to work! (One person is getting a picture (she can't make it to see it in person) of a single sock (socks by request) and an IOU.)

Read More......

Friday, December 19, 2008

New Tutorial: Gift Pouches

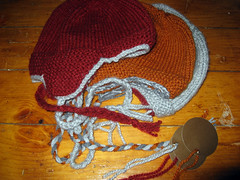
thorpe hats finishedI finally finished the Thorpe hats. I think the original knitting pre-dates this blog; this picture was just taken in September, but I actually knit the hats back in the early summer. I have so many kids on my Christmas list that if a hand-made gift is an option, I need to start early. (Plus, I was actually in the mood.) I confirmed that the boys would like hats, and kind of goofy would be good. I got a list of their favorite colors and was warned not to spend too much on the yarn because, well, they're kids. Thorpe is decidedly not goofy, but earflaps are fun and certainly not your standard watch cap, so I settled on that pattern using Jiffy Thick & Quick since it happened to come in all 3 of the suggested colors. This week, I finally got the contrasting edging done -- it called for crochet, but I finally decided to pick up & knit stitches all the way around, then bind off. It's pretty close -- and braids (easily cut off if they don't like them).

On my mind for several weeks was how I was going to wrap all these hats (there are 3 more). I figured out a plan, but wanted to wait until I could photograph all the steps (in case it worked). I wanted to use materials I already owned, and the stack of Christmas-themed scrap-booking paper (that I bought to make these garlands) was perfect. Without further ado, may I present

Gift Pouches Tutorial
(Click any image to embiggen)
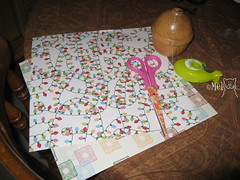
gift_pouch1_materials_wmMaterials:
• Scrap-booking paper in preferred size (12"x12" shown) - 2 sheets per gift
• String or twine
• Scissors
• Tape
• Not shown: materials for closing. You can sew the edges, use 2-sided tape, use packing tape, etc.


gift_pouch2_gift _wmOh, and a present to wrap. This method of wrapping is great for odd-shaped objects like this dog toy, or a knitted/crocheted hat.

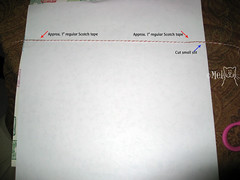
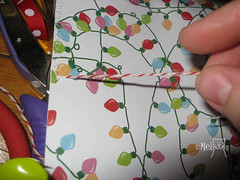
gift_pouch3_taping_wmSelect a sheet for the front of the package and turn over. On one edge, cut a short slit about 1" long.

Cut a length of string or twine a few inches longer than the width of the paper.

About 1/4-1/3 from the top of the page, tape the twine to the back of the paper, using regular desk tape. Only tape an inch or two on each side. If you tape all the way across, the recipient will have to deal with tape either still holding the package shut or just getting in the way.

gift_pouch4_slit_wmTurn the sheet over and pull the string from that edge over into the slit.

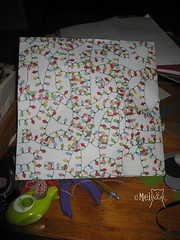
gift_pouch5_finished_wmAlign the top sheet (with the string) back to back with another sheet of paper (right sides facing out). Using preferred method, close 3 sides of the package, making sure that the twine in the slit is free, and the twine on the opposite edge is secure. (Note: if you sew the sheets together, make sure you use a needle that's reserved for this purpose.)

Place gift in package, then close up fourth side.

gift_pouch6_pull_wmIf you like, make a little tab on the end of the string, along with ribbons, bows and gift tags.

Give gift.

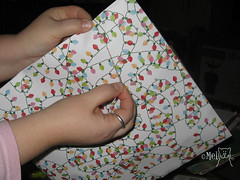
gift_pouch7_pullharder_wmRecipient should grasp an edge, grab the string and pull across the paper. (You can see here that I attempted to sew the sheets together, but my machine refused to cooperate (unrelated to the project*), so I switched to tape, at least for the purposes of this tute.)

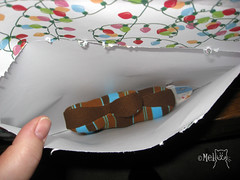
gift_pouch9_inside_wmOh, what's that?

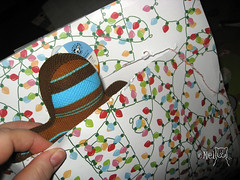
gift_pouch8_open_wmTa-dah!


*The machine was damaged, ever so slightly, during the move. We learned that the piece that holds on the foot is called the ankle, and that was the piece that was damaged -- just bent enough to prevent the spring from doing its job.

Read More......

Friday, October 17, 2008

Crafty Fun Friday

This is going to be my last Crafty Fun Friday. I'll still keep an eye out for cool projects to share, but I need to pare down my bloglines drastically so I can actually read some of the blogs. This will mean fewer finds, but since I haven't had a CFF entry for weeks, pretending to do it regularly is not getting it done anyway. I'll keep using the tag "crafty fun friday" so people can find related posts, but they won't necessarily be posted on Fridays, and very likely not weekly.

(cooking)Chuck's Apple & Gruyere Pie

(sewing) Bean Bag Chair

(furnishing) Re-purposing an old dresser. What a clever idea!

(cooking) How to make bread. According to this entry, it's "cheap, delicious, healthy, and easier than you think," and definitely has fewer ingredients and preservatives. Via Dainty Kitty.

(embroidering) How to use an iron-on transfer pencil. If you're into embroidery, this could be a lot of fun -- you could make a pattern out of just about anything flat.

(organizing) Scroll down to the bottom for this cute idea for shoes-in-the-entry (Yes, I hear Martha suggested something similar, but Saucy was first.)

(interesting) How to get rid of a wart. No crafty result at the end, but it's quite interesting.

(fascinating) Ha! Different tag. Okay, it's crafting, but seriously. Bunny Slippers. There really isn't anything else to say, except of course, I have to. Bunny Slippers! I'm not even a "bunny person" but I love bunny slippers. I have one single slipper left from a pair I kept at my parents' house when my mom was sick (she had a pair, too). I wore my previous pair OUT. I can't wait to try these!

(cooking) 5-minute Chocolate Mug Cake (Gadgetgirlnz on Ravelry - I've been meaning to post this for ages)

4 tablespoons cake flour(that’s plain flour, not self-raising)
4 tablespoons sugar
2 tablespoons baking cocoa
1 egg
3 tablespoons milk
3 tablespoons oil (probably too much. 3 teaspoons seems to work better!)
3 tablespoons chocolate chips(optional)
a small splash of vanilla essence
1 coffee mug

Add dry ingredients to mug, and mix well
Add the egg and mix thoroughly.
Pour in the milk and oil and mix well.
Add the chocolate chips (if using) and vanilla essence, and mix again.

Put your mug in the microwave and cook for 3 minutes at 1000 watts. The cake will rise over the top of the mug, but don’t be alarmed!

Allow to cool a little, and tip out onto a plate if desired.

Read More......
Friday, October 10, 2008

Moo Ideas

Happy Friday! I want to be blogging more, but I'm so tired and work is so hectic! (Not complaining. I still have a job, and we are hectic on purpose. My boss volunteers us for stuff all the time so we can keep our visibility up and look even more essential.)
FAA June Sponsor Swap -- closed

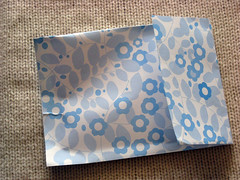
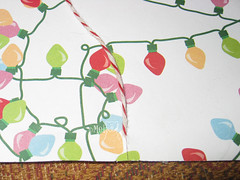
A quickie: One of my pics on Flickr was tapped to be included in a Moo Ideas page, Creative Gift Tags and Wrapping, which went live recently (I received an email this AM).

Read More......