 Quick Lunchtime Post.
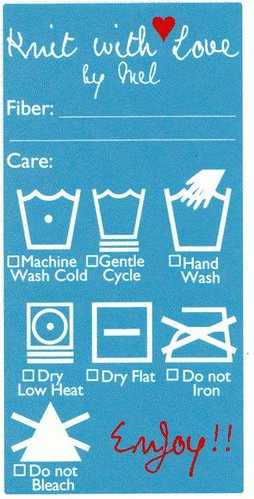
I made these care tags a couple of weeks ago to attach to hand-knit gifts, and thought I'd share. They're still a work in progress - I want to add a "for:" line in the next set - but I'm pretty happy with them.
The images were snagged from a nice PDF of care instructions. Since PDFs can be resized, I set the magnification very high, then used a screen capture program to grab each image. In Photoshop, I switched them from black to white, and made them transparent.
I've been printing them out (6 to a sheet) onto cardstock, then punching a small hole in each and using some of the baker's twine (that I'm never going to run out of) and a tiny safety pin to attach the tag to the knitted item.
PS. I'm not sure I'm back to posting regularly, but I do have a few topics, so I'll be around for awhile.
Tuesday, November 30, 2010
Care Tags

Sunday, December 28, 2008
Gift Parcels in Action
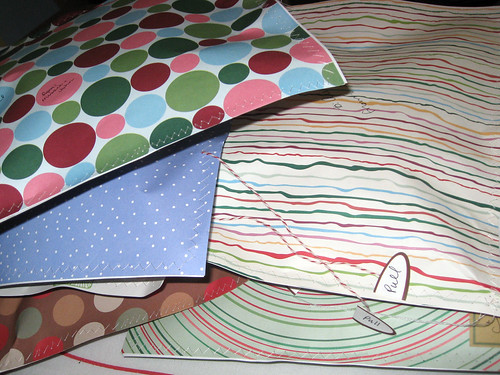
Some friends are on their way here to celebrate Christmas with us. I spent a good portion of yesterday finishing up a couple of gifts and wrapping everything. We went from an estimated twelve people total (including us) to four, so it will be a quieter and calmer afternoon than anticipated. Some of the items are crafty, and many are wrapped in my new gift parcel method, which, apparently, requires a blog post.
- Jdub is getting Firefly on DVD, plus an IOU for a Jayne hat -- if she wants one (I try not to knit surprises anymore).
- Her husband, M, is getting the surgical scrub caps mentioned previously.
- The kids are getting knitted hats (some pictured in the parcel how-to post), although they won't be here to open them.
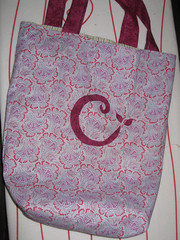
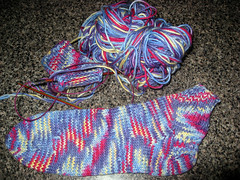
- They'll be taking back gifts for another family, who couldn't make it, including a tote bag and an IOU for a finished pair of socks:
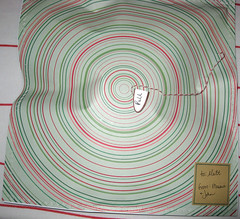 Close-up of a parcel (I sewed them all closed -- really like the look!)
Read More......
Close-up of a parcel (I sewed them all closed -- really like the look!)
Read More......
Making Seek & Find Bottles
Sort of a tutorial. There are others out there -- I linked to at least one when I did Crafty Fun Fridays (old blog) -- but I've been in a picture-taking mood, so you get my version as well. I've been meaning to make some ever since I first posted, and have been stashing small items with the project in mind, but never got around to it. A few weeks ago, I went to a baby shower where one of the games was a bottle like these (except it was a giant baby bottle and filled with baby-themed items). Long after the time was up, the guests were turning the bottles back & forth, trying to check everything off the list.
For Christmas, I wanted to give these to my niece and nephew, hoping that I hadn't waited too long and that K, my 10-year-old niece, wouldn't think them too childish. They actually enjoyed them, and I have a few lessons learned to share along with the photos I took during the making. Gather Materials
Clear plastic bottle with wide mouth. (I used a large Aquafina bottle.) Drink the water, remove the label, rinse and make sure it's dry as a bone -- bottle and lid.
Cheap/stale rice. No sense using the good stuff; it's not going to be eaten later! (I got 3-lb. bags for $2 ea. at Big Lots.) This size bottle took about 2 lbs. each.
Small toys (more on that later).
Glue (I used Gorilla Glue, because it's what we had.) You don't want the kids opening the bottles and spilling rice everywhere! (Plus, many of the toys are choking hazards.)
Tools: scissors & funnel
Optional: Permanent markers to color-code bottles, if desired; cards to list items; rubber bands; hole punch (for cards)
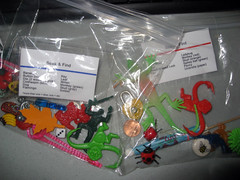 About the toys
Gather a bunch of smallish non-perishable items (Close-up). Some regular household items will also work.
Lessons learned: the tiny diary-size key was too small and couldn't be found in either bottle, by children or adults. The bee bead turned out to be the exact color of the rice and was also not found by children or adults. Truly white items (like the dice) worked out okay. Too long items (like the huge paper umbrella) aren't a great idea (but the flamingo was fine). I don't recommend foam items (like the leaf).
If you're going to make a list, make sure all the items fit through the bottle opening first. The monkeys had to be forced in (because I'd already made the lists and laminated them!). Keep toys away from tiny tots until they're safely sealed inside the bottles!
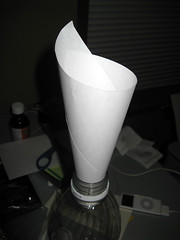 Snip a corner off the rice bag, and using a funnel (plastic or an improvised paper one), pour a few inches of rice into the bottle.
 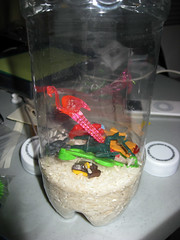 This picture shows another lesson learned: rather than stopping at one point and shoving all of the toys into the bottle like I did, add one or two every inch or so. You'll have less work trying to get things redistributed.
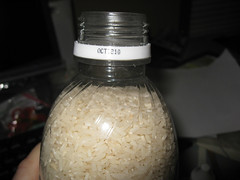 The amount of rice in the bottle dictates the difficulty level. I wouldn't go higher than this point, but if you wanted to make it easier, you could stop about an inch earlier.
 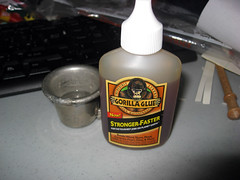 Glue the cap onto the bottle. As mentioned previously, I used Gorilla Glue. To do so, I moistened the outside of the bottle, where the lid would screw on, with just a bit of water on my fingertip, and applied 3 tiny drops of glue on the inside of the lid. When the lid was screwed on, it distributed the glue enough so the bottles couldn't be opened. (The kids were trying to do so within minutes!)
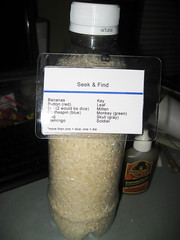 You could simply say "there are twelve (or ten, or fifteen) items in this bottle; find them." I went a step further and made up little color-coded cards and laminated them (using some old ID tag sheets), attaching them to the bottles with rubber bands.
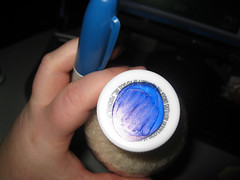 Finally, I used permanent markers to make dots that matched the stripes on the cards so the kids could match up the bottles to the cards if they became separated. I didn't designate a bottle per child; I figured they could just swap them back and forth until they were tired of them. As it was, my niece grabbed the red one, and nephew J. grabbed the blue one, and they were perfectly content to each "own" one, and share later.
 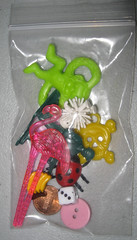 Want to try? I'll send this bag of ten assorted items to a commenter. I usually only get one response, if any, but just in case there are more, I'll draw a name from the comments on Wednesday afternoon. You'll just need to find a bottle, rice, glue, and any additional items you want to add.
Read More......
Want to try? I'll send this bag of ten assorted items to a commenter. I usually only get one response, if any, but just in case there are more, I'll draw a name from the comments on Wednesday afternoon. You'll just need to find a bottle, rice, glue, and any additional items you want to add.
Read More......
Friday, December 26, 2008
Gifts by Request
Occasionally, I receive thinly veiled hints or direct requests for Christmas gifts. I like this very much... as long as what's being requested is something within my scope of experience (and the person is someone I would be giving a gift to). I would much rather give someone a gift I know they want! A couple of years ago, Jdub asked for bouffant-style scrub caps, and I delivered. A few months ago, she told me that her husband needed some too, but a different style. She said this would be an ideal gift for him, because he was sick of using the paper ones, so I asked her to get me a sample to work with.  She delivered a single paper cap, similar to the one pictured here (pulled from online; I have no idea who this model is).
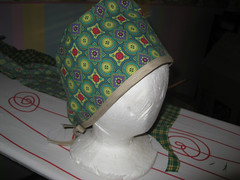 I very carefully took apart that paper hat and traced the pieces onto the backside of some sturdy gift wrap, then made a prototype.
 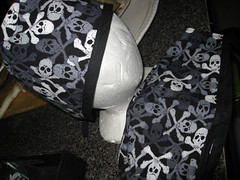 After a lot of trial and error, I finished two scrub caps last night. It was close -- after the prototype, I was sure I had it down, so I cut out pieces for two hats, only to find that the resulting hats were too small. Back to the drawing board! Luckily, the third hat worked out okay, so I cut the final one and it was perfect. I don't think there is enough of this fabric left for one hat. Whew! (So, I made four hats, not counting the prototype, but only two will work for this gift.) On the off chance that someone who knows Jdub's hub sees this, please don't say anything to him. He won't see the hats until Sunday afternoon!
I sent a quick camera-phone pic to Jdub last night and she is sure he'll love them. Double whew! Christmas with that group is this coming Sunday. I have most of the gifts done, but only one is wrapped. Two more gifts to make. I'd better get to work! (One person is getting a picture (she can't make it to see it in person) of a single sock (socks by request) and an IOU.) Read More......
Friday, December 19, 2008
New Tutorial: Gift Pouches
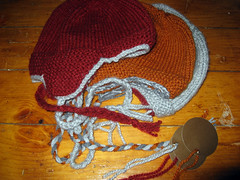 I finally finished the Thorpe hats. I think the original knitting pre-dates this blog; this picture was just taken in September, but I actually knit the hats back in the early summer. I have so many kids on my Christmas list that if a hand-made gift is an option, I need to start early. (Plus, I was actually in the mood.) I confirmed that the boys would like hats, and kind of goofy would be good. I got a list of their favorite colors and was warned not to spend too much on the yarn because, well, they're kids. Thorpe is decidedly not goofy, but earflaps are fun and certainly not your standard watch cap, so I settled on that pattern using Jiffy Thick & Quick since it happened to come in all 3 of the suggested colors. This week, I finally got the contrasting edging done -- it called for crochet, but I finally decided to pick up & knit stitches all the way around, then bind off. It's pretty close -- and braids (easily cut off if they don't like them).
On my mind for several weeks was how I was going to wrap all these hats (there are 3 more). I figured out a plan, but wanted to wait until I could photograph all the steps (in case it worked). I wanted to use materials I already owned, and the stack of Christmas-themed scrap-booking paper (that I bought to make these garlands) was perfect. Without further ado, may I present
Gift Pouches Tutorial
(Click any image to embiggen)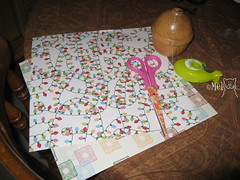 Materials:
• Scrap-booking paper in preferred size (12"x12" shown) - 2 sheets per gift
• String or twine
• Scissors
• Tape
• Not shown: materials for closing. You can sew the edges, use 2-sided tape, use packing tape, etc.
 Oh, and a present to wrap. This method of wrapping is great for odd-shaped objects like this dog toy, or a knitted/crocheted hat.
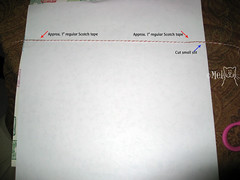 Select a sheet for the front of the package and turn over. On one edge, cut a short slit about 1" long.
 Cut a length of string or twine a few inches longer than the width of the paper.
About 1/4-1/3 from the top of the page, tape the twine to the back of the paper, using regular desk tape. Only tape an inch or two on each side. If you tape all the way across, the recipient will have to deal with tape either still holding the package shut or just getting in the way.
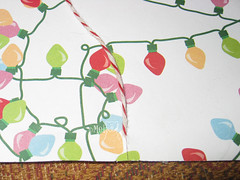 Turn the sheet over and pull the string from that edge over into the slit.
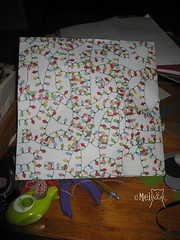 Align the top sheet (with the string) back to back with another sheet of paper (right sides facing out). Using preferred method, close 3 sides of the package, making sure that the twine in the slit is free, and the twine on the opposite edge is secure. (Note: if you sew the sheets together, make sure you use a needle that's reserved for this purpose.)
Place gift in package, then close up fourth side.
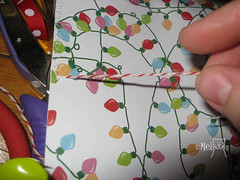 If you like, make a little tab on the end of the string, along with ribbons, bows and gift tags.
Give gift.
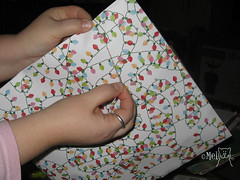 Recipient should grasp an edge, grab the string and pull across the paper. (You can see here that I attempted to sew the sheets together, but my machine refused to cooperate (unrelated to the project*), so I switched to tape, at least for the purposes of this tute.)
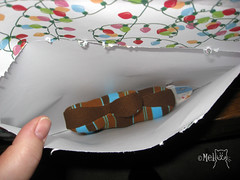 Oh, what's that?
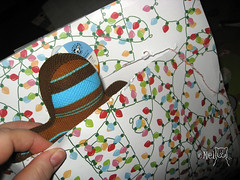 Ta-dah!
*The machine was damaged, ever so slightly, during the move. We learned that the piece that holds on the foot is called the ankle, and that was the piece that was damaged -- just bent enough to prevent the spring from doing its job. Read More......
Saturday, November 22, 2008
Baby Shower Gift for Darwin
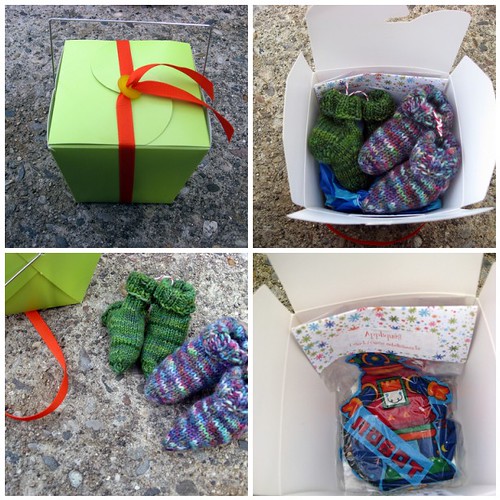
I took the above to a baby shower this afternoon. The card was on the inside of the package, but the mother (Hi, Mel!) recognized my particular style of wrapping. It was a lovely afternoon, with good company. Bonus: I won the first contest and was directed to the gift I needed to select; it was an acorn cookie jar! I saw them at Joann Fabrics awhile back and wanted one, badly, but didn't get one b/c of the move. So, yay!!! (I'll get a picture of it and the acorn salt & pepper shakers that were inside later.)
Then, home to pack. SIL C came over for a couple of hours and helped me pack and sort the fabric and sewing area that is currently in the dining room. Later, her dad brought over a pile of boxes. We may actually get this done!