
 I've been knitting for about five years, and the idea of knitting socks both fascinated and terrified me at the same time, up until about a year ago. Some people start on socks as one of their first projects, some wait awhile. I waited a good long while!
I taught my friend, Anita, how to knit a couple of years ago, and she was knitting socks (two at a time!) within a year, while I was still intimidated. Then, I found a book that changed everything for me. Come to find out, with the right instructions -if socks are something that appeal to you - they aren't that hard or scary at all; in fact, they're downright magical. Wearing hand-knit socks is like having your feet hugged all day long.
I've found it to be rather difficult to knit socks for people when I can't see them a few times during the process and try them on, so I've declared that - from now on - I only knit them for John, myself, and babies.
Before I made that decision, I got some yarn to knit some socks for my friend Heather's birthday. I ordered three skeins, because she's kind of like an Amazon (tall! biggish feet (although if you took my shorter feet and multiplied by width, they're probably similar in size)), and I wanted a pair, too. We have matching tattoos, so matching socks (at least with the same yarn), would be no big deal. I got the bright idea to ask her if she wanted me to knit the socks for her, or if she wanted to learn herself. Woot! Off the hook: she wanted to learn how to knit socks.
It was a little late, but her "birthday" package arrived at her doorstep late last week. I combined the yarn with the book that demystified the process for me, and some other goodies, and sent it off. About 3 months late, but that's how we roll. Heather is ready to get started, so I sent her a big, long email with a bunch of tips. I figured I'd share it with you all as well, with some modifications for a broader audience. The book I sent: Getting Started Knitting Socks. There are tons of tutorials online (including some with videos), other books, classes, etc. This is what finally made it all make sense for me. Your mileage may vary (YMMV). Heather already knows that the copy she got is one I already owned (not new). I misplaced my first copy, not long after purchasing, and had to go buy another. Of course, a few weeks later, the first book turned up in a drawer (I don't generally keep books in drawers).
TIP: Make a photocopy of the pattern you're going to use, and any supporting pages and pop those in your knitting bag, rather than carrying the book around. As long as you own the book, this is perfectly acceptable.
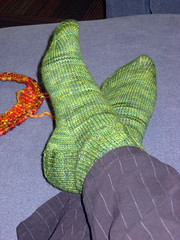
The yarn I sent is not the yarn she'll start with. This requires a size US2 needle (or thereabouts); pretty small for a first time. But it's fabulous, is it not?
I've suggested that she take a similar pattern for a baby sock, and use worsted-weight yarn to get a feel for the steps involved. This pattern - North Country Cotton Baby Socks (rav link) is pretty much identical to the basic pattern in the book, except for scale.
I've been pretty amazed to find that one can wear wool socks during the hottest days of summer, and have one's feet be the most comfortable part of one's body. The type of yarn I like to use is superwash wool with 20-25% nylon for added durability.
Please note that there are several methods of knitting socks, and each has its pros and cons - and fans. I'm introducing Heather to the most basic, top-down socks.
Stuff you need:
Pattern. There are some excellent free patterns online for beginners.
Notebook & Pen. I highly recommend making notes on something besides (or in addition to) your pattern copies. Why? Notebooks are a little harder to lose. I write down everything that might be different from the pattern so I'll remember for sock #2, or a future pair. Because I lost my notes from John's first pair (see!) I've been extra careful this time.
I make notes like: "7 spi, size 3 needles, DK yarn. CO 68 with MC, 4 rows 2x2, switch to CC, 4 rows, MC - 10 rows." Translation: 7 stitches per inch (actual name of pattern AND my gauge), needle size, yarn weight. How many stitches I cast on, and the pattern I work in (k2xp2 ribbing) I'm using 2 colors of yarn, so this reminds me where to add the stripes.
Needles. I am a huge fan of the Magic Loop method, and do one sock at a time, cuff-down, on one 32" circular needle. You can also use two shorter circs or a set of double-pointed needles (DPNs). I love the fixed circulars from Knit Picks (KP). They start around $4.99 a pair for the metal ones, and the cables are plenty flexible for Magic Loop (more on that later).
Be careful when ordering from KP - they list two size 2 needles (for example), but if you look, the size given in mm is different. The first is a US2, the next would be considered a 2½.
Gauge. Even if you're one of those people who always gets the gauge printed on the ball band, you're going to need to knit up a small swatch in the round, to find out your gauge. Most sock yarn bands list a range of gauges for a range of needle sizes. When you knit in the round, you have a slightly different tension than when you knit flat.
Stitch markers. Most sock patterns are written for DPNs. I use stitch markers to indicate where the yarn would be divided on needles, and just pretend. I mark the end of the round with a double-ringed marker, which makes it very easy for me to figure out where I left off if I was in a decrease (or increase) row. You put it on the first loop when you're on a decrease row, and the second loop for the one after that (always plain knitting). Very simple.
Row counter. You need something to keep track of your rows. For some parts of the sock, I just go by length, but in other areas (like the heel flap), you need to count rows. There are many different kinds. You can get one of the clicky kind at the craft store (use a coupon - they're like $11!), one that hangs from your knitting where your roll a small dial, or just make marks on a piece of paper. (You'll want to take notes anyway.) Another way is to link a series of rings together, and move to the next loop on every row (like these) There are even bracelet kinds, but I haven't made or used one.
Notes on Techniques
- Magic Loop (ML) method. I learned Magic Loop by watching a video on KnittingHelp.com (Advanced Techniques - scroll down to "small diameter circular knitting" - it's the third item). I haven't seen the video that KnitPicks has on their site (might even be the same one). If you do ML, you must have circular needles with a long and thin/flexible cable.
- Picking up stitches. Probably the toughest part, and it's not really that hard. Just don't get too far ahead of yourself and you'll be fine. One thing at a time.
- Toes. Everyone goes on and on about the Kitchener graft. They either love it, hate it or are afraid of it. Count me in among the haters. I just do a gathered toe (back of the book), like at the top of a hat, then turn the sock inside out and make sure I weave in the ends really well. If John can't destroy the toe, I think it's fairly safe.
- Cuff. I have big ankles, but even when my socks fit comfortably, I tend to scrunch the sock down. I figure, why spent a whole lot of time knitting a long leg/cuff when it's going to end up bunched around my ankle? I usually do about 3" of ribbing, then a few rows of st st before I start the heel flap. If you have more slender ankles, or like longer socks, just knit longer before you start the heel flap.
This is just one person's view of knitting basic socks. YMMV.


No comments:
Post a Comment