
 Materials:
Scissors
Tweezers (optional)
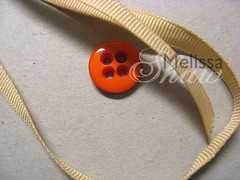
Buttons: Pick buttons with large holes. You need to get the ribbon through, but not too loosely.
Ribbon: Grosgrain or woven ribbon that is 1/4" to 3/8" wide seems to work the best. The ribbon pictured is 3/8". Wider ribbon can work, depending on the button, but so far has been more of a pain than a satisfied result. Plan on the ribbon shredding a little, regardless.
Tip: Don't use pricey or too-cool vintage buttons and ribbons, as they might get tossed like any other wrapping! (I guess that would depend on the recipient. If the person would "get" that the button was part of the present, then use whatever you want. (Use whatever you want anyway. I'm bossy, but not THAT bossy.))
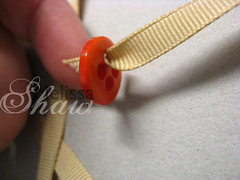 Cut a length of ribbon, allowing several inches for fraying, sizing and tying.
Cut one end at an angle to give it a point, then push it through the front of the button.
If you are preparing some ties in advance, you don't have to cut the ribbon. Just put the cut end down through the front of the button, and then back up from the back. You can adjust the length, then cut when ready.
 Grab the point of the ribbon, using tweezers if necessary, and pull a length through the hole.
Freshen the cut point if needed and push it through an opposite hole on the back of the button.
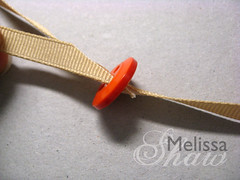
Another view.
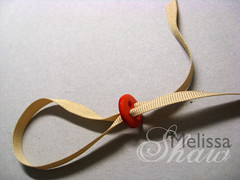 Even out the ends.
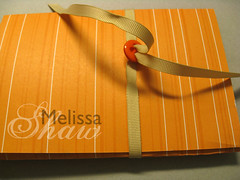 Slide the loop of ribbon over your package, straightening any twists, and pull ends so they're snug (but not too tight -- you don't want to distort your package).
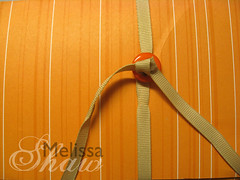 If desired, tie a loose knot. Your ribbon may fit snugly enough so a knot isn't necessary. Trim the ends to the desired length -- at minimum, removed frayed ends.
 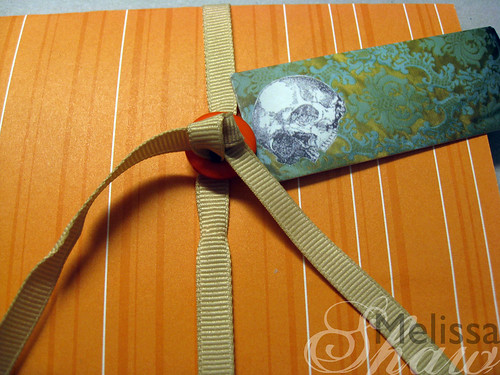 Add a tag and give!
I like to use Moo Mini Cards whenever possible, especially if I can match up the card and wrapping paper. (Confession: I frequently pick out the card first, then the paper!) I punch a tiny hole in the end of the card and thread through a bit of baker's twine or embroidery floss.
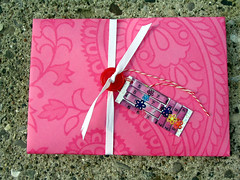 To wrap simple packages, 12x12" scrapbooking paper is ideal. I just fold in the corners, envelope style, and use the ribbon tie -- tape isn't required! More examples mixed in the ribbons, tags and packaging set on Flickr.
 Originally posted as part of a swap update on my old blog.
Copyright
Copyright 2008 Melissa Shaw


2 comments:
I saw these and thought of you. http://www.primrosedesign.com/VB538.html
This is such a simple yet adorable idea! I Looove buttons but never thought of using them like this on a package. Thanks for posting this!
Post a Comment